
Build an Auction Website with WordPress: A Quick Guide

- Preparing to Build Your Auction Website with WordPress: A Guide on How to Build an Auction Website with WordPress
- Setting Up WordPress: How to Build an Auction Website with WordPress
- How to Build an Auction Website with WordPress
- Turn Your Vision into Reality and Build a Successful Auction Site with the Ultimate Auction Theme!
- Conclusion: Mastering How to Build an Auction Website with WordPress
Creating an auction website helps to buy and sell items online with a huge audience of buyers. This type of website can be particularly useful for various purposes. For example, it can be used to sell rare collectibles, vintage goods, cars, etc. If you’re wondering how to build an auction website with WordPress
, this platform provides an easy and efficient way to get the best bids for your items.
Now, coming to the important question on why you should use WordPress to build an auction website? It is mainly due to its user-friendly interface and flexibility to insert add-ons. WordPress is a platform that allows you to create and manage websites for those who don’t want to go into too much technical knowledge. It has a lot of themes that are designed for auction sites. These themes cover essential features like bidding, countdown timers, and payment processing.
WordPress has a huge community support from developers worldwide. If you encounter any issues or need assistance, there are countless resources available. Moreover, WordPress themes are regularly updated so that your auction site remains secure and up-to-date.
Whether you are starting with a small auction site or planning to expand to a larger marketplace, here is a detailed step by step guide on how to build an auction site with WordPress.
Preparing to Build Your Auction Website with WordPress: A Guide on How to Build an Auction Website with WordPress

In order to create an auction website, you need to follow the below steps.
Key Considerations Before Starting
The very first step is to identify your target audience. Knowing who you are trying to reach will help in your website’s design and functionality. Are you targeting collectors of rare items, bargain hunters, or people interested in buying vintage cars? Understanding your audience helps in selecting the right features and marketing strategies.
Next step is to determine the types of items you will auction. Specializing in a niche can attract a specific audience. For example, you might focus on vintage cars, antique furniture, or handcrafted goods. A clear focus can make your site more attractive to users interested in those specific items.
Technical Requirements
Once you have a clear plan, it’s time to focus on the technical requirements. These include selecting a hosting provider, securing a domain name, and obtaining SSL certificates to ensure secure transactions.
Hosting Provider
Choosing a reliable hosting provider is essential for your auction site’s performance and reliability. BlueHost is a reliable and secure choice for hosting WordPress-based auction websites. Here’s a step-by-step guide on how to get started with BlueHost:
Step 1: Visit BlueHost’s Website
Go to BlueHost and navigate to their hosting plans. BlueHost offers various plans tailored to different needs. For most auction sites, the Basic or Plus WordPress Hosting plans are ideal.
Step 2: Select a Hosting Plan
Choose a plan that fits your needs. The Basic plan starts at $2.95 per month and includes:
- One website
- 10 GB SSD storage
- A free domain for the first year
- Free CDN
- Free SSL Certificate
The Plus plan, which allows for multiple sites and offers more storage and features, starts at $5.45 per month.
Step 3: Register Your Domain
Your domain name is your website’s address on the internet. It should be memorable and relevant to your auction site’s theme. During the sign-up process, you can choose a domain name that is short and relevant to your auction site. Try to keep it short, simple, and easy to spell. BlueHost offers a free domain for the first year with their hosting plans.
Step 4: Install WordPress
BlueHost provides a one-click WordPress installation. After purchasing your hosting plan, you can easily set up WordPress through the BlueHost dashboard. This simplifies the process and ensures your site is ready for customization and content.
Step 5: Secure Your Site with SSL
Security is paramount for any auction website. An SSL certificate encrypts the data exchanged between your site and its users, protecting sensitive information like payment details. BlueHost includes a free SSL certificate with their plans, which encrypts data and secures transactions. Activate the SSL certificate to display the padlock icon in the browser’s address bar, indicating that your site is secure.
Step 6: Customize Your WordPress Site
After installing WordPress, select a theme that fits auction websites, focusing on features like bidding and payment gateways. Next, install the necessary plugins that the auction theme requires.
Start Your Auction Site Now
Important Aspects: Creating a Website using Ultimate Auction software with Technical Needs and Selecting the Right Hosting Provider.
Setting Up WordPress: How to Build an Auction Website with WordPress
This step-by-step guide will help you set up WordPress for an auction website efficiently.
Step 1: Install WordPress
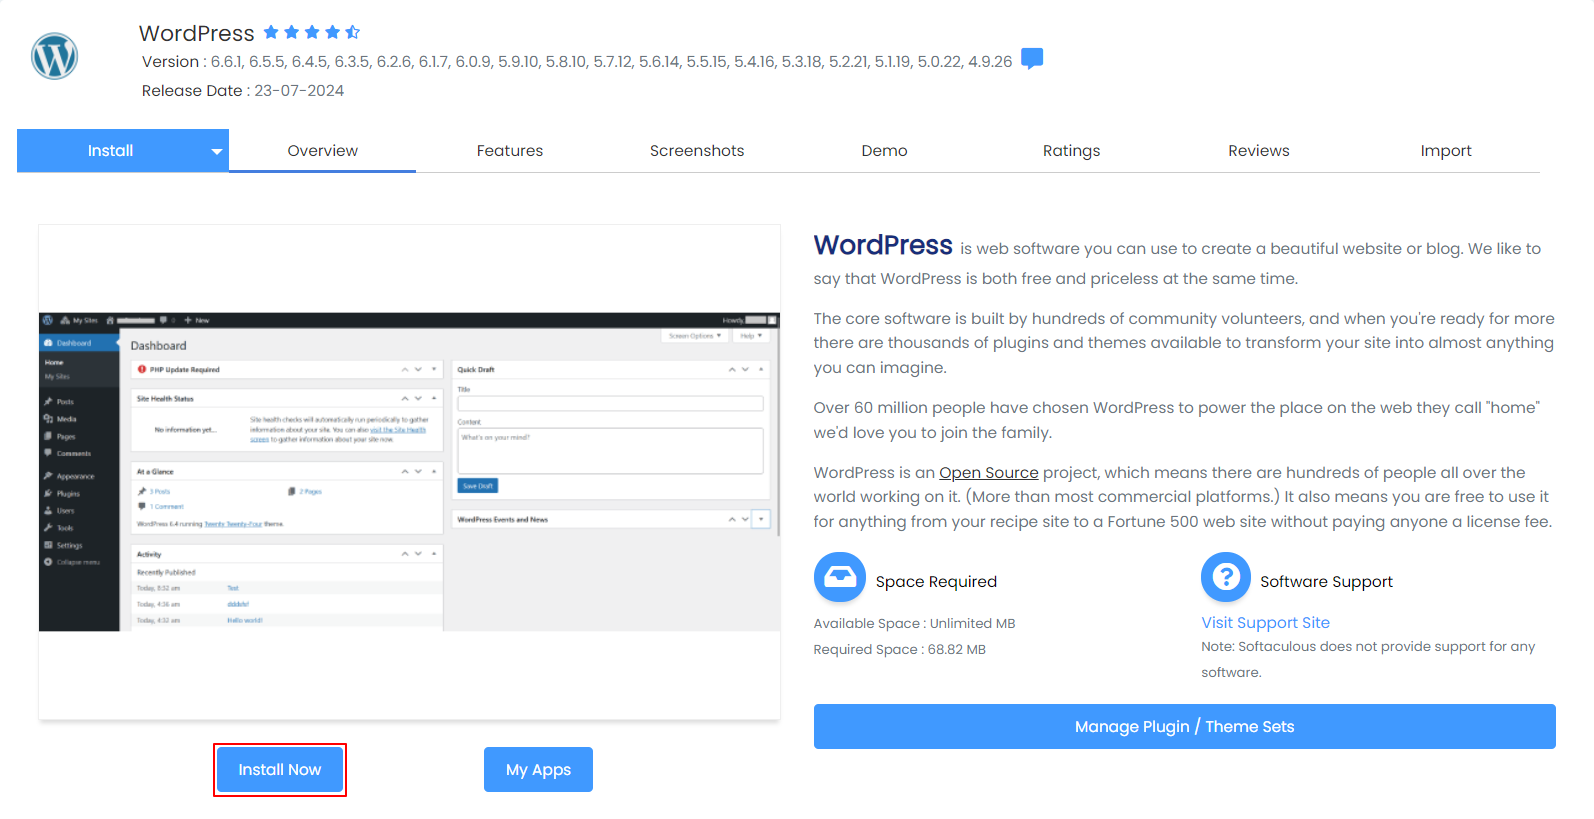
After purchasing your hosting plan and registering your domain, the next step is to install WordPress. BlueHost simplifies this process with a one-click WordPress installation feature. Here’s how to do it:
1. Log into your BlueHost account.
2. Navigate to the “My Sites” tab in the BlueHost dashboard.
3. Click “Create Site.”
4. Follow the on-screen instructions to set up WordPress, including choosing your site name and tagline.
Step 2: Select and Install a Theme
Once WordPress is installed, the next step is to choose a theme that suits an auction site. There are many themes available, both free and premium, that are specifically designed for auction websites.
GetUltimateAuction: This theme adds auction functionality to your WordPress site, allowing you to manage bids, set reserve prices, and more.
Here’s how to install a theme:
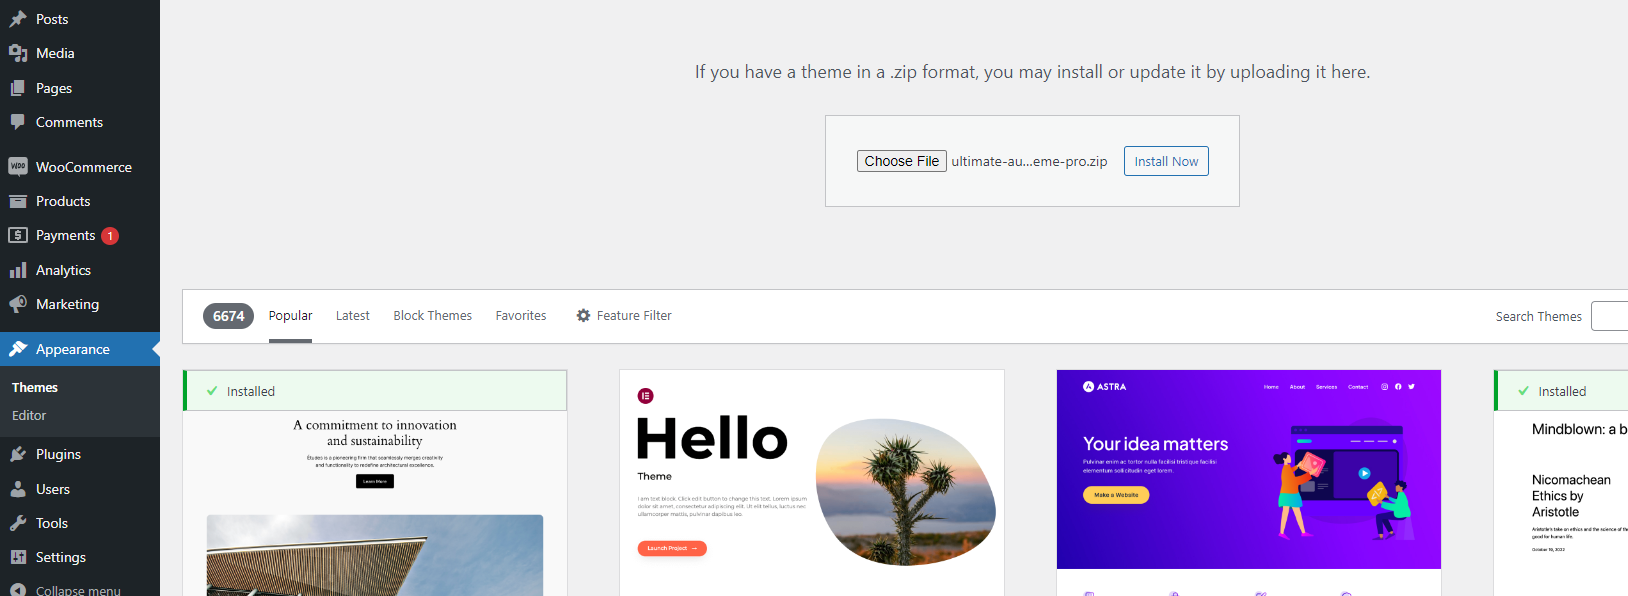
1. Go to the WordPress dashboard.
2. Navigate to “Appearance” and then “Themes.”
3. Click “Add New” and use the search bar to find a suitable auction theme.
4. Preview the theme to see how it looks.
5. Click “Install” and then “Activate” to apply the theme to your site.
Step 3: Install Essential Plugins
To turn your WordPress site into a fully functional auction website, you need to install required plugins related to your auction theme. You can also installed other third party plugins which enhance the functionality of auction website according to your requirement. Here is essential one:
- WooCommerce: For handling payments and product listings.
To install a plugin:
1. Go to the WordPress dashboard.
2. Navigate to “Plugins” and click “Add New.”
3. Use the search bar to find the plugins mentioned above.
4. Click “Install Now” and then “Activate” to add the plugin to your site.
Step 4: Configure Your Auction Settings
Once your theme and plugins are installed, you need to configure your auction settings. This includes setting up auction categories, defining bidding rules, and configuring payment gateways.
1. Go to the theme options for the auction theme you installed.
2. Set up auction categories to organize your items.
3. Define bidding rules such as minimum bids, bid increments, and auction duration.
4. Configure payment gateways like PayPal or Stripe to handle transactions securely.
Step 5: Add Auction Items
Now, you can start adding items to your auction site. Ensure that each item has a clear title, detailed description, and high-quality images.
1. Go to the auctions section in the WordPress dashboard.
2. Click Product/Lot -> Add New
3. Fill in the item details including title, description, starting bid, and upload images.
4. Publish the item to make it live on your site.
Step 6: Test Your Auction Website
Before launching your site, it’s essential to test all its functionalities. This includes placing bids, processing payments, and ensuring that notifications are working correctly.
1. Place test bids to see if the bidding system works.
2. Process test payments to ensure payment gateways are functioning.
3. Check email notifications to confirm users are receiving updates about their bids and transactions.
Now you have set up a WordPress auction website that is functional, secure, and user-friendly. This will help you create a successful platform for buying and selling items through auctions.
Launch Your Auction Site Immediately
Achieve it effortlessly with Ultimate Auction Software
How to Build an Auction Website with WordPress

Setting up auction functionalities on your WordPress site using the Ultimate Auction: Pro Software Theme is a straightforward process. This guide will walk you through the detailed steps to ensure your auction site is fully functional and ready for users.
Step 1: Install and Activate the Theme
1. Download the Theme: Visit the Ultimate Auction: Pro Software Theme page.
2. Upload to WordPress: In your WordPress dashboard, navigate to Themes > Add New, click on Upload Theme, and select the downloaded file.
3. Activate the Theme: Once uploaded, click on Activate Theme.
Step 2: Configure Basic Settings
1. Access Settings: Navigate to the Theme Options via the WordPress dashboard.
2. General Settings: Configure basic settings such as currency, timezone, and auction duration.
3. Payment Settings: Set up payment gateways like PayPal or Stripe to handle transactions securely.
Step 3: Add Auction Categories
1. Create Categories: Go to the Event Category section in the Auctions menu.
2. Add New Category: Enter the name and description for each category. This helps in organizing your auction items and making it easier for users to find specific types of auctions.
Step 4: Add Auction Items
1. Go to Add New Auction: In the Theme menu, click on Add Auction.
2. Enter Details: Fill in the details for your auction item, including the title, description, starting bid, bid increment, reserve price, and auction duration.
3. Upload Images: Add high-quality images of the item to attract more bidders.
4. Publish the Auction: Click on Publish after entering all the required details.
Step 5: Display Auctions on Your Site
1. Create an Auction Page: Go to Pages > Add New in your WordPress dashboard.
2. Insert Shortcode: Enter `[uwa_live_auctions]` into the content area to display all live auctions.
3. Publish the Page: Click Publish to make the auction listing page live on your site.
Step 6: Manage Auctions
1. View Active Auctions: Navigate to the Product/Lot menu in the theme to see all active auctions.
2. Edit or Delete Auctions: You can edit auction details or delete auctions as needed from this menu.
3. Configure Email Notifications: In the theme settings, set up email notifications for various auction events such as new bids, auction ending soon, winning bid confirmation, and payment received.
Special Offer – Limited Time Only!
Rev Up Your Savings: Get 10% off Essential Ultimate Auction Software!
Fill the form and receive directly to your mailbox a discount code.
"*" indicates required fields
Turn Your Vision into Reality and Build a Successful Auction Site with the Ultimate Auction Theme!
Are you ready to take your auction business to the next level? The Ultimate Auction Pro Software is your all-in-one solution for creating a thriving online auction platform. You can create a dynamic, engaging, and profitable auction website using it.
Install and Set Up Theme
- Review Theme Features : Explore demo sites, read documentation, and understand functionalities and customization options.
- Ensure Compatibility : Confirm the theme meets your requirements for auction types, payment integrations, design flexibility, and user interface.
- Purchase License : Choose the appropriate license (single site, multiple sites, or developer).
Follow the purchasing process on the official website to obtain the theme zip file. - Install Theme : Navigate to Appearance > Themes > Add New.
Upload the theme zip file and click “Install Now”.
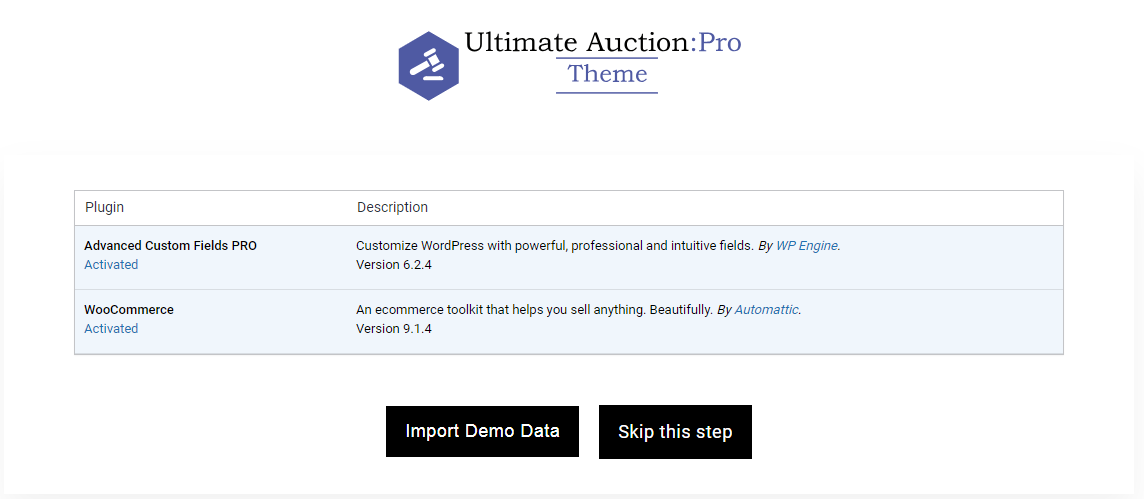
Install and Configure Necessary Plugins
- Extend Functionality : Admin needs to installed the required plugins for theme. Install essential plugins such as WooCommerce and Advanced Custom Fields to fully enable the theme’s functionality.
- Import Demo : During the theme installation, the theme will prompt you to import demo content. Follow the instructions to load sample products, pages, and settings onto your site. Importing demo content can provide a fully designed layout to help you get started quickly.
Design Your Site’s Layout
-
- Custom Header : The theme provides options to customize the header, including setting up the site logo, search box, and login/register buttons, as well as configuring the main navigation menu to create a user-friendly and attractive header.
-
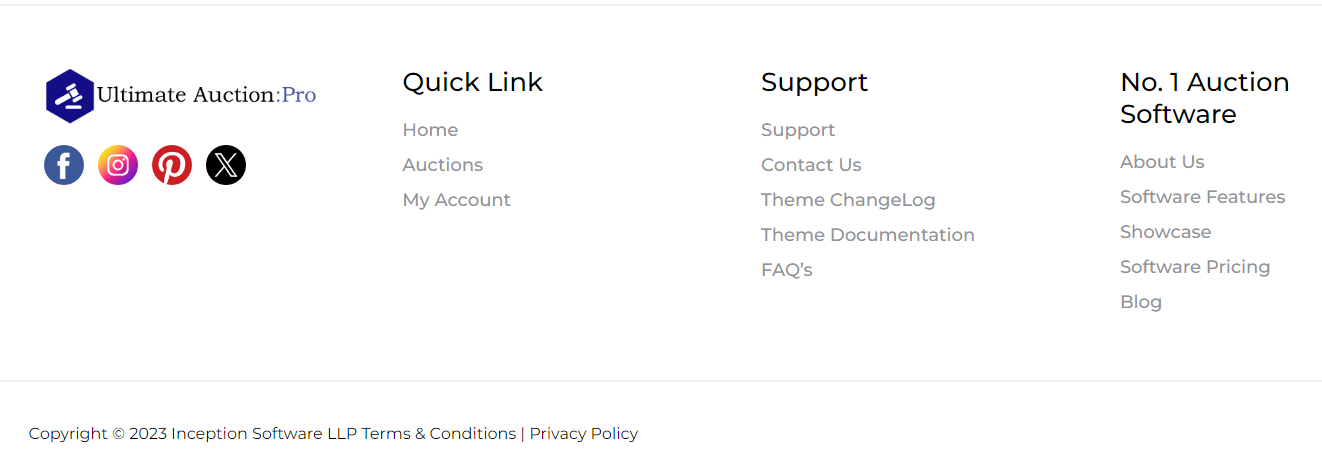
- Custom Footer : The theme offers customizable footer options, including column setup, a copyright bar, and social media icons. Admins can use the theme options panel to arrange content, add a copyright notice, and integrate social media icons for a functional and visually cohesive footer.
-
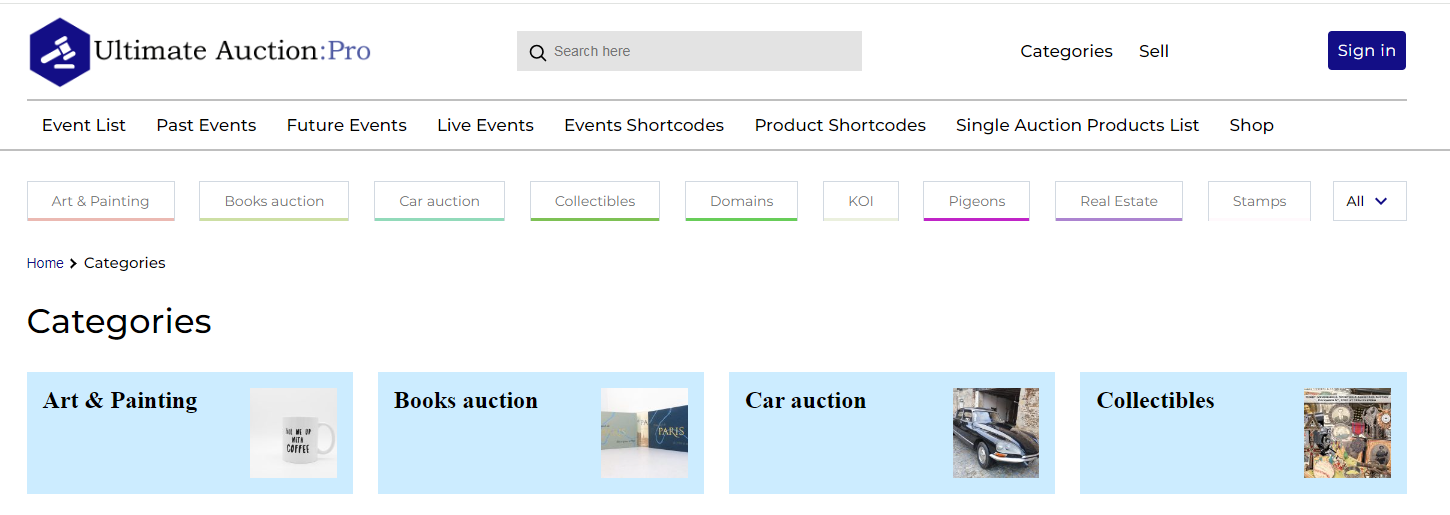
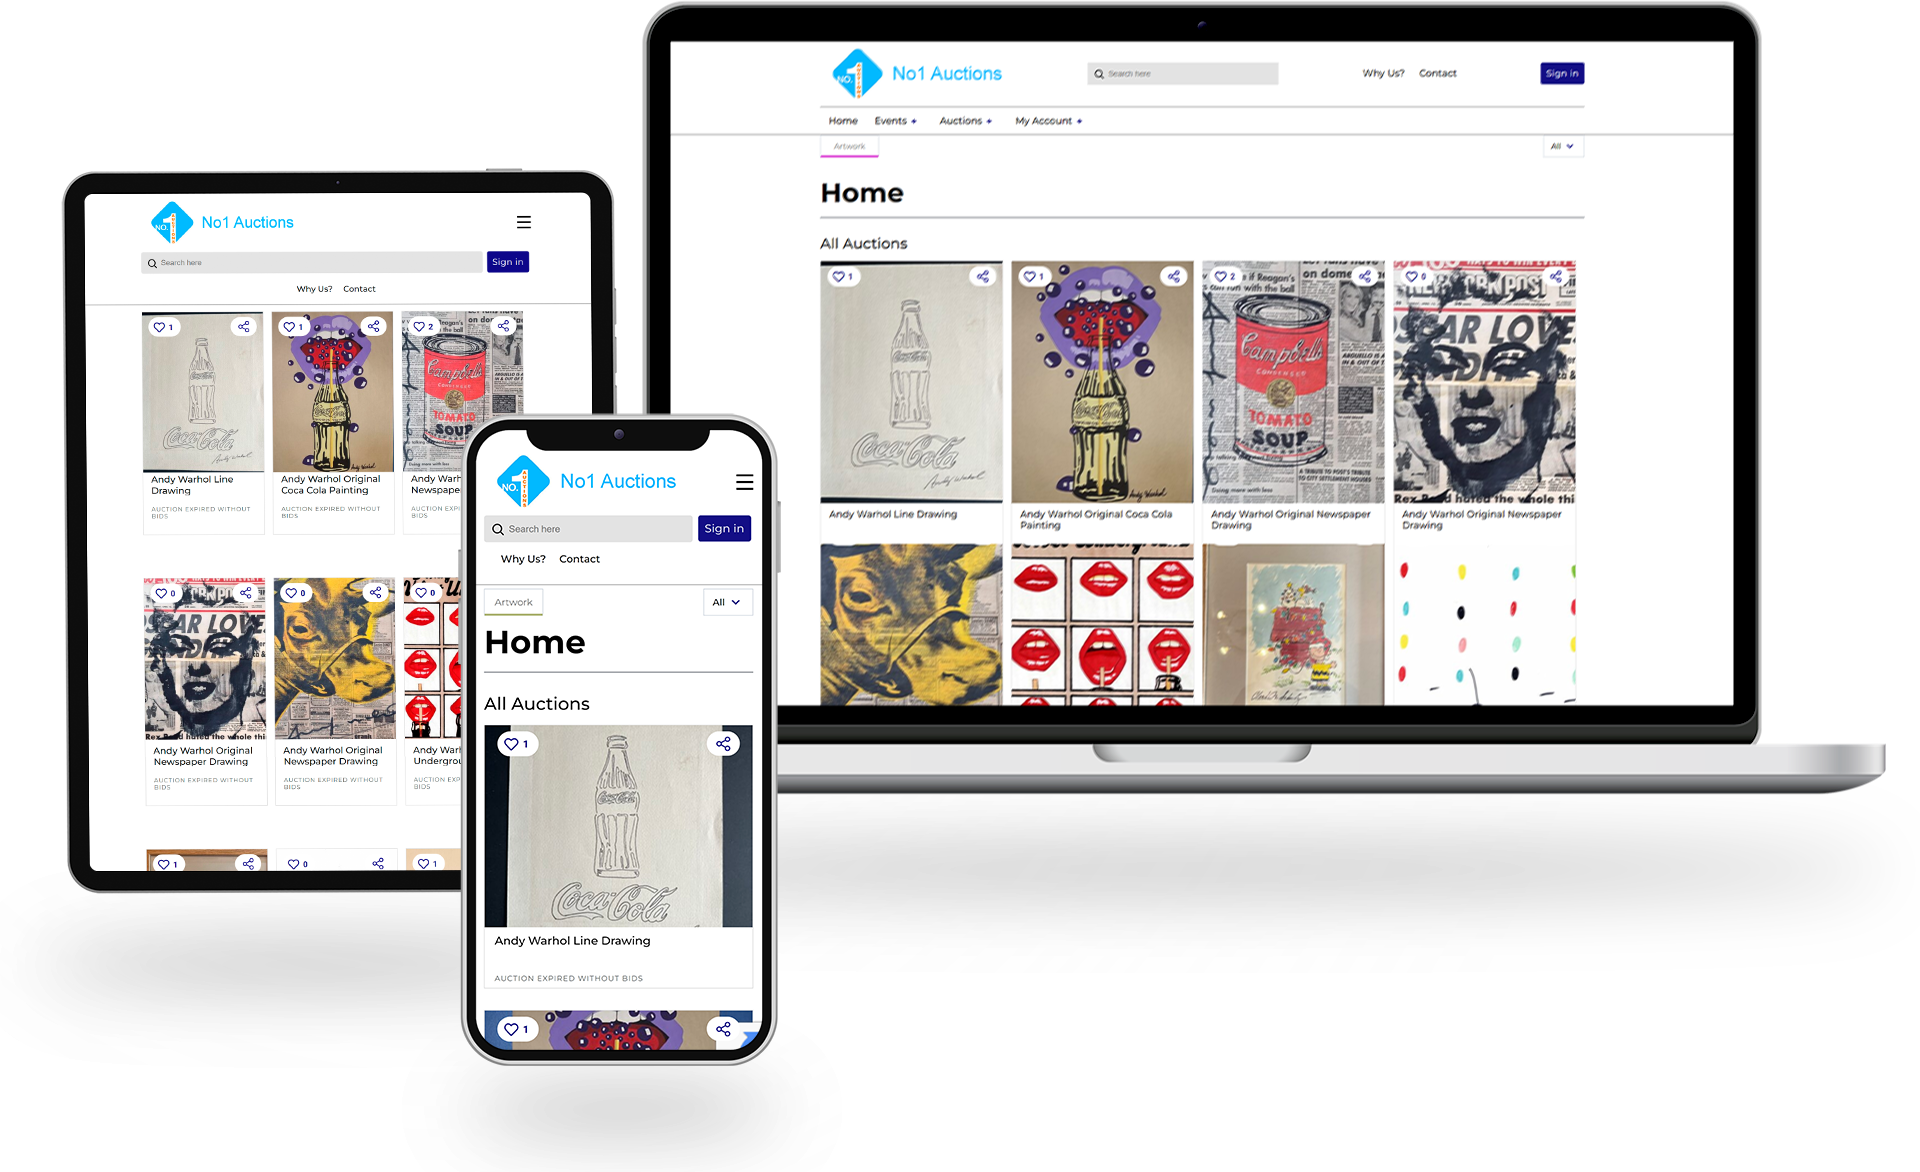
- Home Page Setup: Capture visitors’ attention with a polished and professional homepage design, establishing an ideal first impression for your auction platform.
- Other Pages : Set up additional pages by manually adding content, using shortcodes, or employing drag-and-drop widgets.
Secure Payment and Smooth Transactions
- Payment Integration : Set up secure payment gateways to handle transactions effortlessly.
- Prioritize Security : Apply comprehensive security measures to safeguard your site and its users.
Automate and Optimize
-
- Scheduled Tasks : Use cron jobs to automate regular tasks and keep your site running smoothly.
- SEO and Performance : Optimize your site for search engines and enhance loading speeds with our recommended plugins.
Launch Your Website
- Final Touches : Review your site, ensure all features work flawlessly, and make final adjustments.
- Go Live : Launch your site and start attracting visitors with targeted promotional strategies.
Conclusion: Mastering How to Build an Auction Website with WordPress

Setting up an auction website using WordPress is practical and worth it. Starting with the selection of a reliable hosting provider like BlueHost will give a solid foundation. The installation of WordPress and using the Ultimate Auction Pro theme helps to streamline your work. Configuring settings, adding auction categories, listing items, and managing notifications are all straightforward processes for your site.
You can create a user-friendly auction website with Ultimate Auction Pro. This theme offers features like managing bids, setting reserve prices, handling payments, and sending notifications.
Now is the perfect time to start building your auction website with WordPress. If you need further assistance or have any questions, feel free to contact us. We are here to help you every step of the way. Additionally, consider signing up for our newsletter to stay updated on the latest tips, tutorials, and updates related to auction websites.
Frequently Asked Questions
Get your own Auction Today!
Choose Your Plan
Easy Setup
5 Star Support
Related Post

What Is A No Reserve Auction? Risk, Reward, And Results
In the world of auctions, the term “no reserve auctions” might seem a bit mysterious, but it’s actually a fascinating concept that benefits both sellers and buyers. Are you curious about the world of auctions? Wondering, “What is a No Reserve Auction?” Let’s uncover this intriguing concept that has buyers and sellers captivated. Simply put, […]
Read More
What Is a Proxy Bid? Learn to Win Auctions Easily
What is a Proxy Bid? The idea of proxy bidding has emerged as a sophisticated and strategic approach, transforming the conventional auction experience in contemporary auction dynamics Auction enthusiasts can navigate the competitive landscape more subtly and effectively with the help of cutting-edge auctioneer software and creative proxy bidding strategies. This in-depth guide will explore […]
Read More
How to Sell Whiskey Online Like a Pro
Are you planning to sell whiskey online but don’t know where to start? Don’t worry, we are here to guide you on how to sell whiskey online and where to sell whiskey effectively. As the demand for rare and valuable whiskey bottles continues to rise in the United States, selling whiskey online has become a […]
Read More